
Projects
See every project in the workspace, create projects for your clients and manage each project's team, assets and Figma access.
Projects lists every project in the workspace, across all clients. Use it to create projects, keep project details up to date and manage who works on each project.
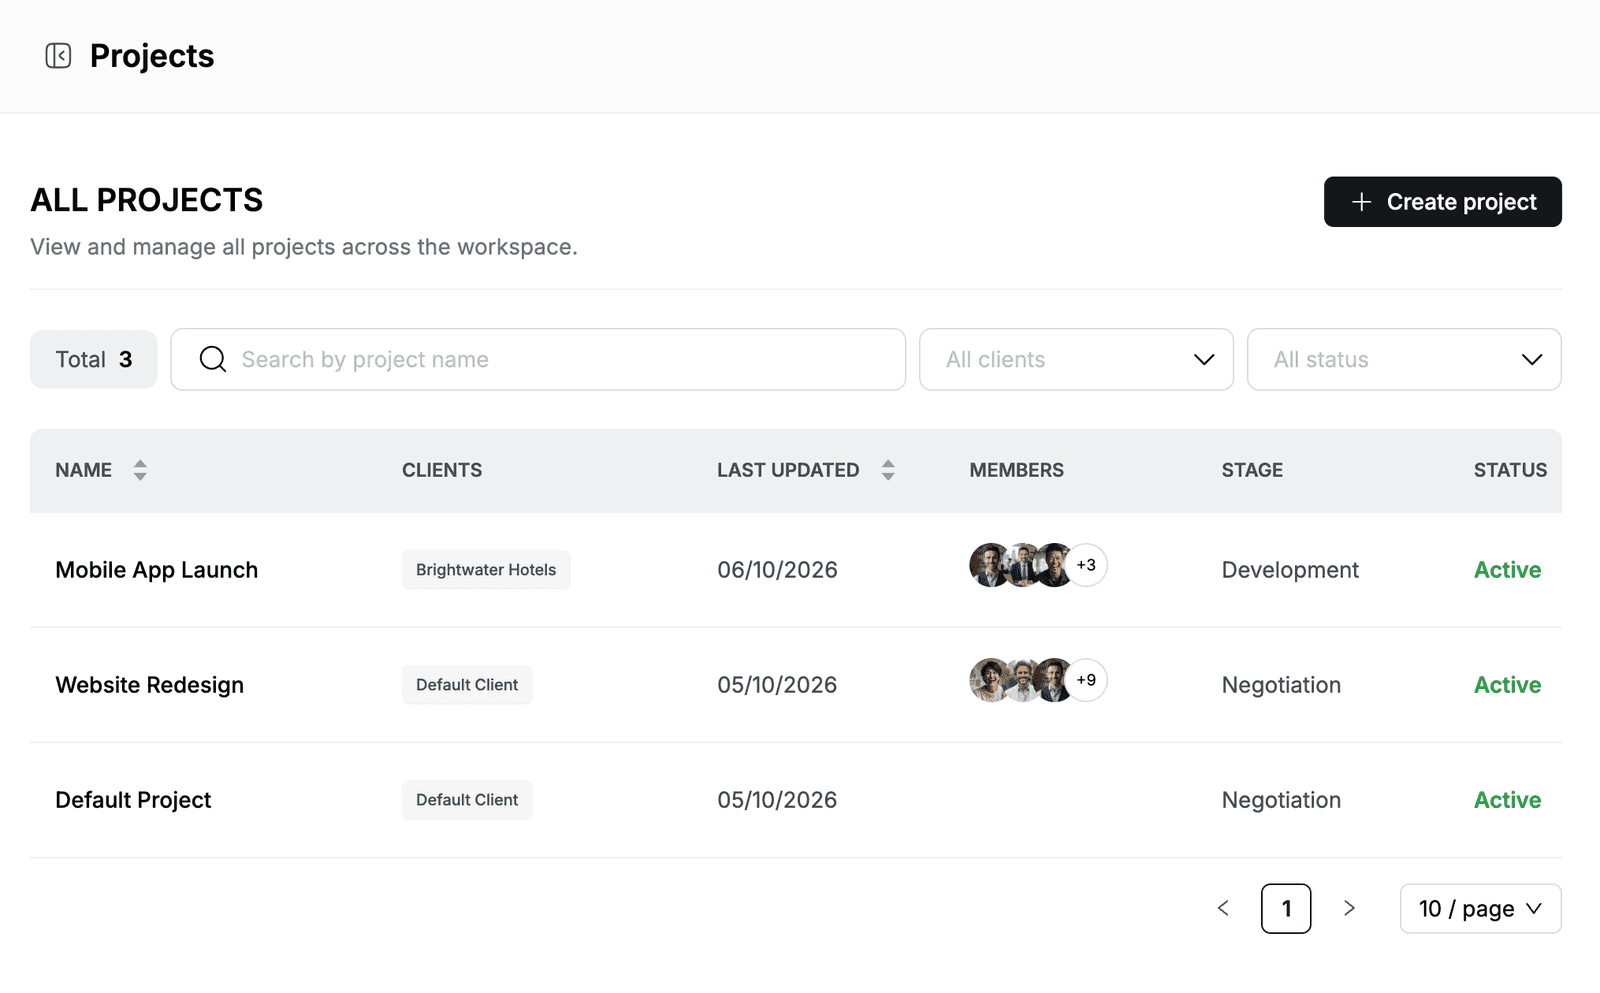
Find a project
Go to Projects. ALL PROJECTS lists each project with its CLIENTS, LAST UPDATED date, MEMBERS, STAGE and STATUS. Total shows the number of projects.
To narrow the list:
- Enter part of a name in Search by project name.
- Select a client in All clients.
- Select Active or Inactive in All status.
To sort the list, click the arrows next to NAME or LAST UPDATED. To show more projects on one page, change 10 / page at the bottom of the list.
Create a project
- Go to Projects and click Create project. The Add new project page opens.
- In Clients, select the client the project is for, for example
Brightwater Hotels. For internal work, keep Default Client. - Enter a Project Name, for example
Mobile App Launch. When you leave the field, Hplix fills in a Project Key from the name, such asMAL. You can change it. - Select a Stage and check the Start Date. It defaults to today.
- Optional: select an End Date and enter Descriptions.
- Under Management tool, keep Planix and select a Project Mode: Scrum or Kanban.
- Click Add new project.
The project appears at the top of the list, and you are added to it as a Project Admin.
| Field | Description |
|---|---|
| Project Key | The prefix for the project's work items in Planix, for example MAL-1. |
| Stage | Where the project is in its lifecycle: POC, Negotiation, Development, Closed or Signed contract. |
| Go Live | Whether the project is live: Yes or No. |
| Integration Services | Optional connections: Cloud service, Version control, Management tool and Figma projects. |
You can also create a project from a client's page in Clients, or from Planix with a template. See Set up projects.
View project details
Go to Projects and click a project. The project page shows its status, description, Last updated date, Stage and Timeline (start and end dates), with four tabs:
| Tab | What it shows |
|---|---|
| Member board | The people on the project, with their status, project role, department, client email and join and exit dates. |
| Management tool | Opens the project in its management tool, such as Planix. |
| Assigned assets | Company assets linked to the project, with their type, status, serial number and security value. |
| Figma project member | Each project member and the Figma projects they are assigned to. |
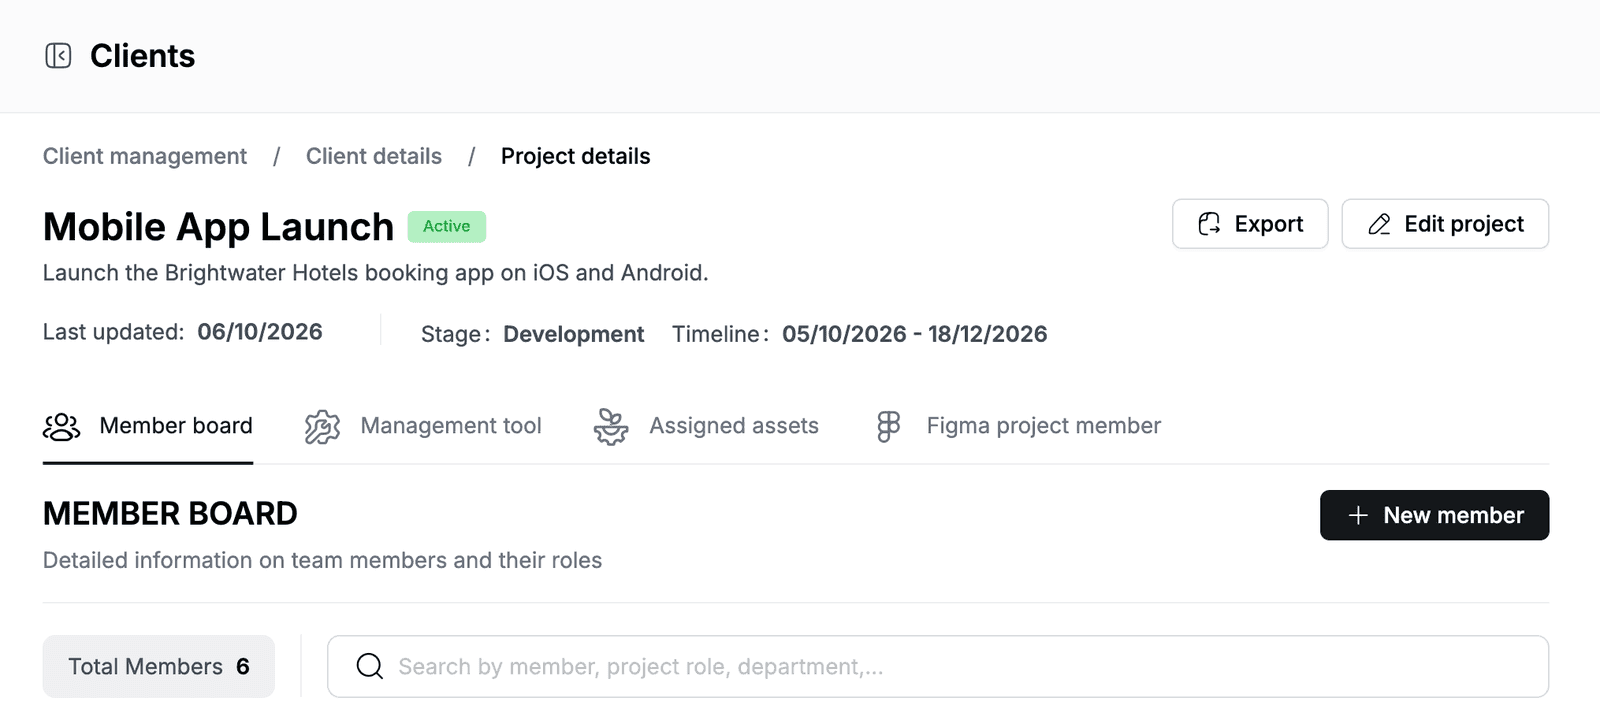
Add members to a project
Only project members can be assigned work items in Planix.
- Open the project. The Member board tab is selected.
- Click New member.
- Select the Member and enter their Client Email.
- Select a Project Role: Project Admin or Project Member.
- Select the Joined At date. Add an Exited At date or a Note if needed.
- Click Add. To add more people without closing the window, click Add and Continue.
Total Members shows the new count.
Project lead
In Planix, the project lead is the first person added as Project Admin after the person who created the project. To make someone the lead, add them as Project Admin before anyone else.
Edit a project
- Go to Projects.
- Click ⋮ at the end of the project's row and click Edit project. You can also open the project and click Edit project.
- Change the details. You cannot change the client here.
- Click Update.