
Set up projects
Create a Planix project, start from a template, add members and customize statuses and work types.
A Planix project holds the work items, sprints and settings for one piece of work, such as a client engagement or an internal initiative. This page covers creating a project and preparing it for your team.
Create a project
- Go to Planix and click New Project. The Add new project page opens.
- In Clients, select the client the project is for. For internal work, keep Default Client.
- Enter a Project Name, for example
Website Redesign. - Enter a Project Key, for example
WR. Work items in the project get keys that start with it:WR-1,WR-2, and so on. - Select a Stage and a Start Date.
- Under Management tool, keep Planix and select a Project Mode: Scrum or Kanban.
- Click Add new project.
| Field | Description |
|---|---|
| Stage | Where the project is in its lifecycle: POC, Negotiation, Development, Signed contract or Closed. |
| Go Live | Whether the project is live: Yes or No. |
| Start Date / End Date | The planned project dates. End Date is optional. |
| Descriptions | A short summary of the project. |
| Integration Services | Optional connections: Cloud service, Version control, Management tool and Figma projects. |
Use Scrum to plan work in fixed-length sprints. Use Kanban to keep work flowing with limits on work in progress.
Start from a template
Templates give a new project ready-made work types, statuses and views.
- Go to Planix and click Browse templates.
- Pick a template from Recommended, Workspace templates or a category, such as Software delivery or Client delivery. To show only one mode, click Scrum or Kanban above the list.
- Review the preview. It lists who the template is best for, its mode, work types, workflow and fields, and the view the project opens on.
- Under Options, set the Sprint duration and choose whether to Add sample work items.
- Click Use template. The Add new project page opens with the template's settings.
- Complete the project details and click Add new project.
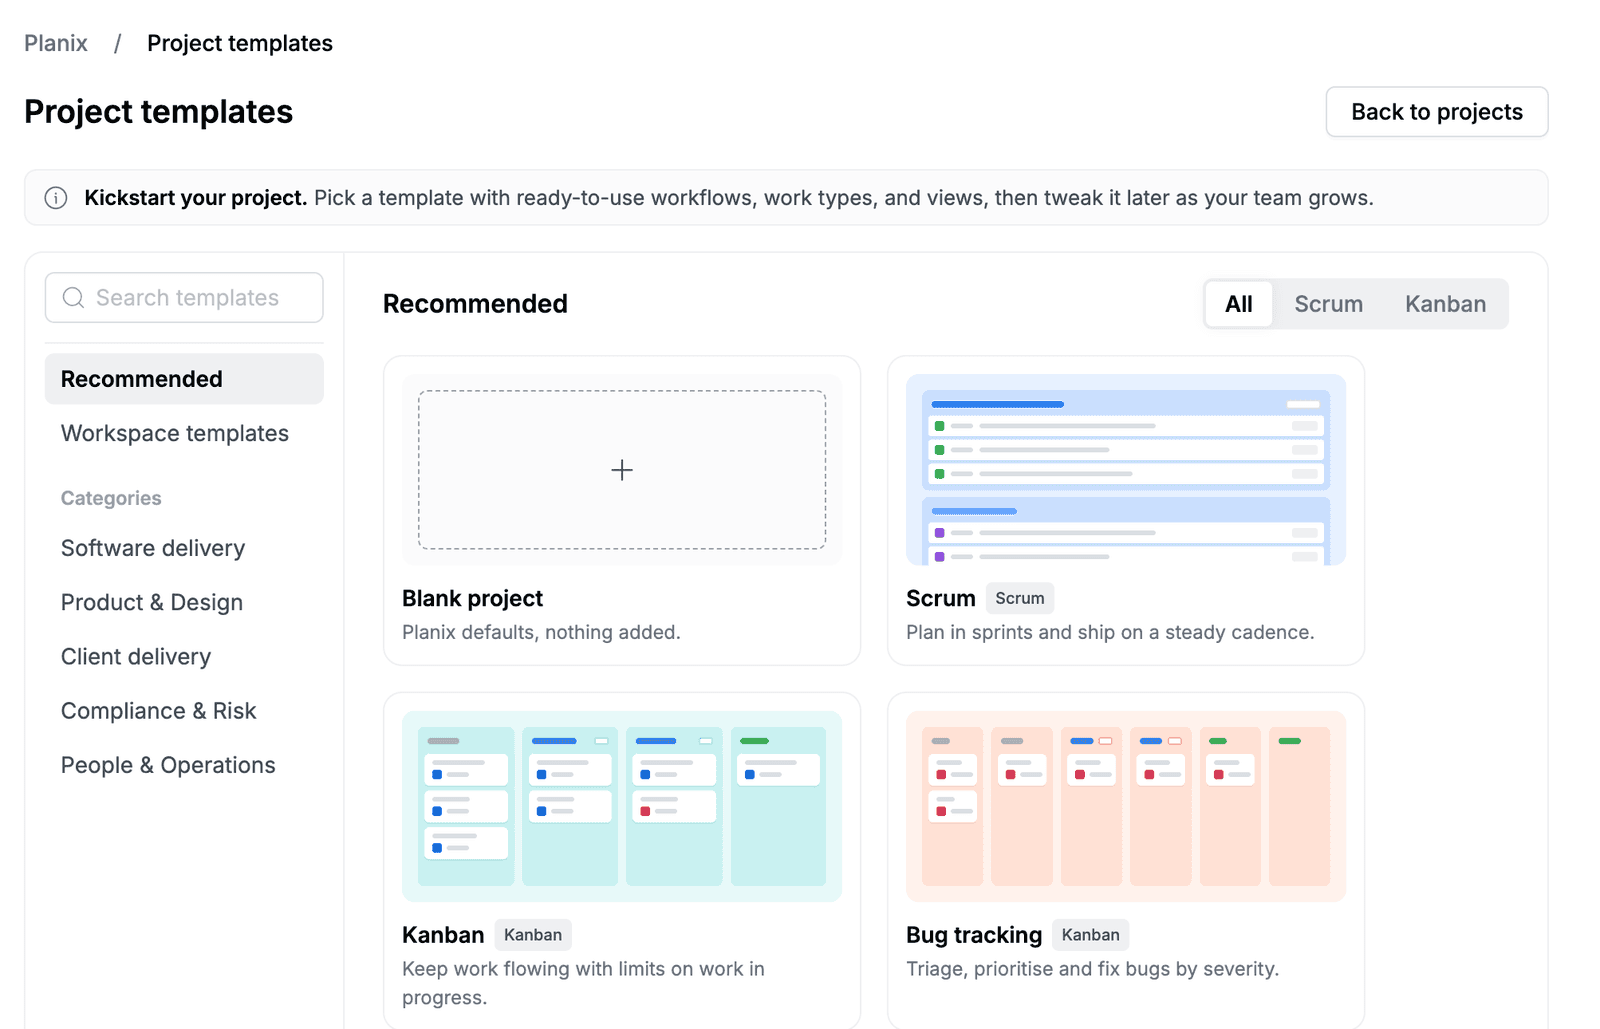
To reuse the setup of an existing project, open the project, click ... next to its name, and click Save as template. Apply template in the same menu works only on a project that has no work items yet.
Add project members
Only project members can be assigned work items in the project.
- Open the project, click ... next to its name, and click Settings.
- Click the Access tab. The project's Member board opens.
- Click New member.
- Select the Member and enter the Client Email.
- Select a Project Role: Project Admin or Project Member.
- Select the Joined At date. Add an Exited At date or a Note if needed.
- Click Add. To add more people without closing the form, click Add and Continue.
Change project details
- Open the project, click ... next to its name, and click Settings.
- On the Details tab, update the Project Key, Default Assignee or Project Mode. To change the project picture, click Change Icon.
- Click Save.
Customize statuses
Statuses are the columns on the board. New projects start with TODO, IN PROGRESS, READY TO QA, REVIEW and DONE.
- Open the project settings and click the Setting Status tab. Workflow shows the current statuses in order.
- Under Add New Status, enter a Status Name.
- Select a Status Category: To do, In Progress or Done.
- Click Save.
Customize work types
Each project has the work types Epic, Story, Task, Bug and Subtask.
- Open the project settings and click the Work Types tab.
- Select a work type to see its fields, grouped into Description fields and Context fields.
- Turn on Require for fields people must fill in.
- To add a custom field, drag a field type from Fields into one of the sections.
- Click Save Changes.
To add your own work type, click Create work type.
Import projects
You can bring projects in from Jira, Asana or Trello, including their statuses and members.
- Go to Planix and click Import.
- Select Jira, Asana or Trello and click Next.
- Connect your account. For Jira, enter the Jira Url, an API Key and the Email of the API token's owner.
- Follow the remaining steps to map projects, statuses and members, then finish the import.