
Work items
Create, update and organize Planix work items: epics, stories, tasks, bugs and subtasks.
Every piece of work in a Planix project is a work item. Each one has a type, a status, an assignee and a key, such as WR-3, that you can use to find it.
| Work type | Use it for |
|---|---|
| Epic | A large body of work that groups related stories, tasks and bugs. |
| Story | A feature or requirement described from the user's point of view. |
| Task | A piece of work to do. |
| Bug | A problem to fix. |
| Subtask | A smaller step inside another work item. |
Create a work item
- Open the project and click Create at the top right.
- Select the Work Type. Task is selected by default.
- Enter a Summary, for example
Build responsive homepage. - Fill in the other fields you need, such as Description, Assignee, Priority, Parent and Sprint. To assign the item to yourself, click Assign to me.
- Click Create.
To create several items in a row, select Create another before you click Create. The form stays open and clears for the next item.
| Field | Description |
|---|---|
| Status | The status the item starts in. |
| Parent | The epic or work item this item belongs to. |
| Sprint | The sprint the item is planned for. Leave it empty to keep the item in the backlog. |
| Story Point Estimate | The size or complexity of the work. |
| Attachment | Files up to 10 MB each. |
| Linked Work Items | Other work items this one relates to. |
| Flagged | Marks the item as blocked by an impediment. |
Add items from the backlog
- Go to the Backlog view.
- Under a sprint or under Backlog, click + Create.
- Type the summary and press Enter.
Update a work item
- Click the work item's key, for example
WR-3. Its details open next to the list. - To change the status, click the status button under the title and select a new status.
- Under Details, click any field to change it, such as Assignee, Priority, Sprint or Due date.
Changes are saved as soon as you make them. Activity at the bottom shows comments and the full history of changes.
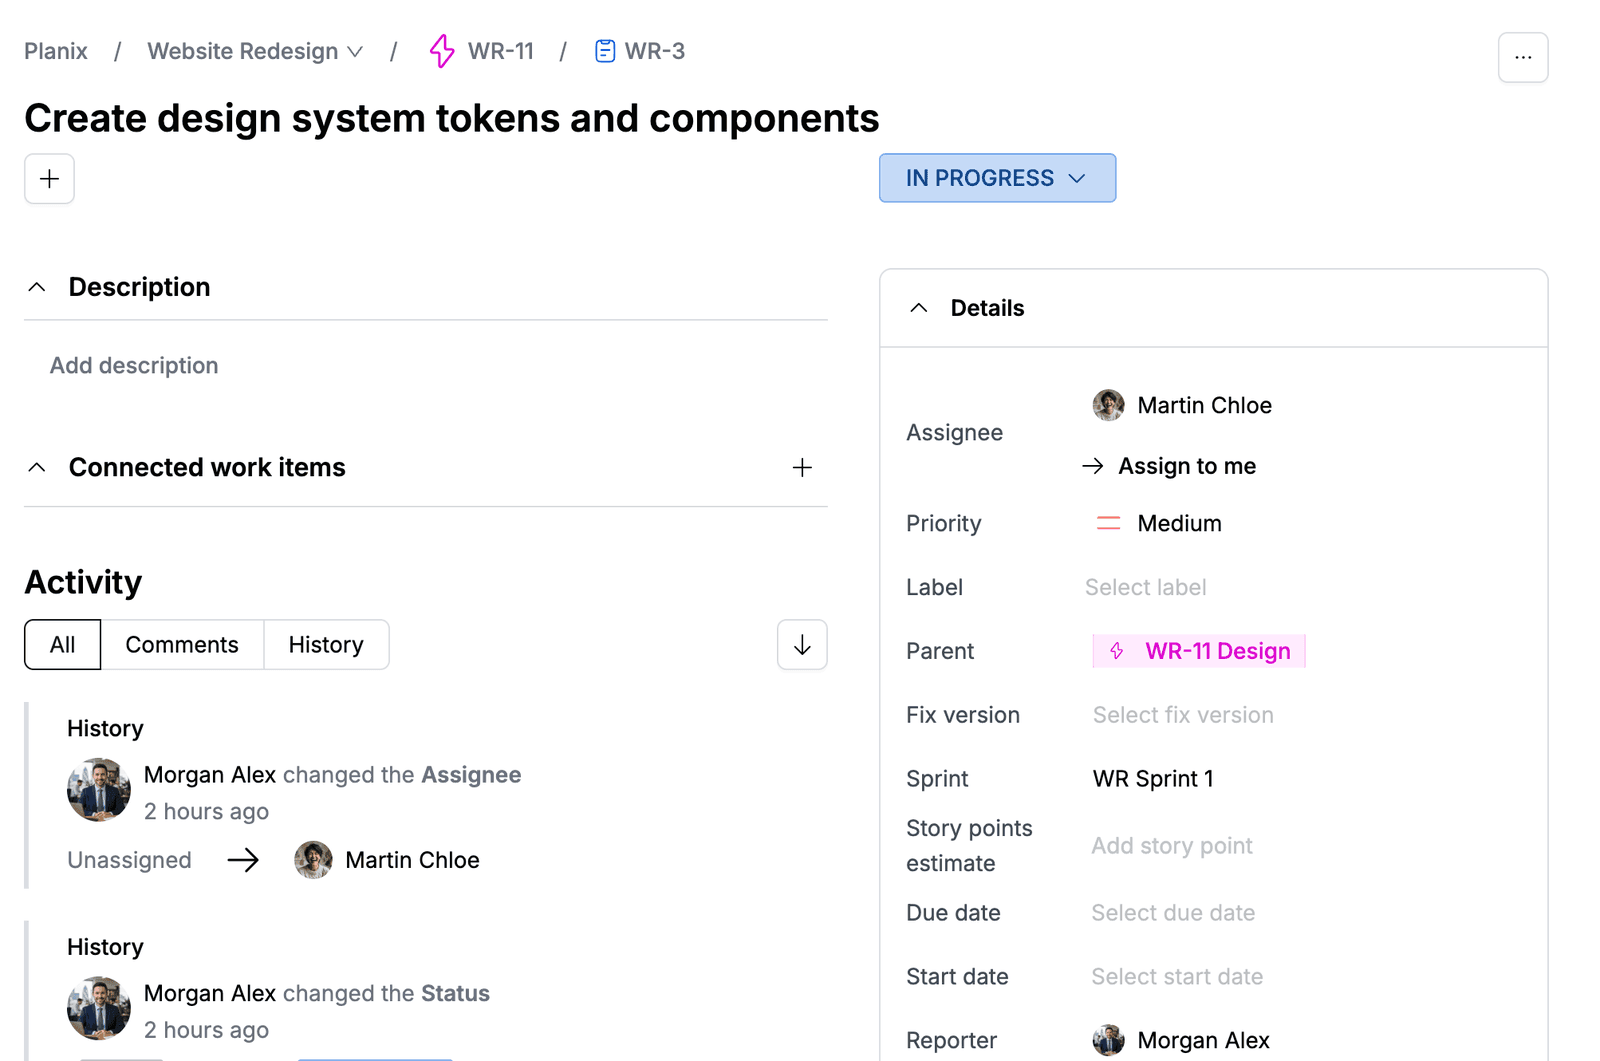
To add more to a work item, click + under the title:
- Create subtask to split the work into smaller steps.
- Add connected work to link related work items.
- Add attachment to upload files.
- Add web link to add a link to a web page.
Group work with epics
- Click Create, select Epic as the Work Type, enter a Summary, for example
Design, and click Create. - Go to the Backlog view.
- On a work item's row, click + Epic and select the epic.
The epic's name appears on the row. You can also set the epic in the work item's Parent field. Epics and their progress appear on the Timeline view.
Flag, clone, archive or delete a work item
Open the work item, click ... at the top right, and select an action.
| Action | Result |
|---|---|
| Add flag | Marks the item as blocked. |
| Change Parent | Moves the item under another epic or work item. |
| Clone | Creates a copy of the item. |
| Archive | Moves the item to the Archived work items view, where you can restore it. |
| Delete | Deletes the item. |
Archive instead of delete
If you might need a work item later, archive it. Archived items can be restored.