
Wiki
Write and share your team's knowledge in spaces, collections and docs.
Wiki is where your team keeps its shared knowledge, such as handbooks, policies, processes and project notes. Content is organized into spaces. Each space holds collections, and each collection holds docs.
Find a space
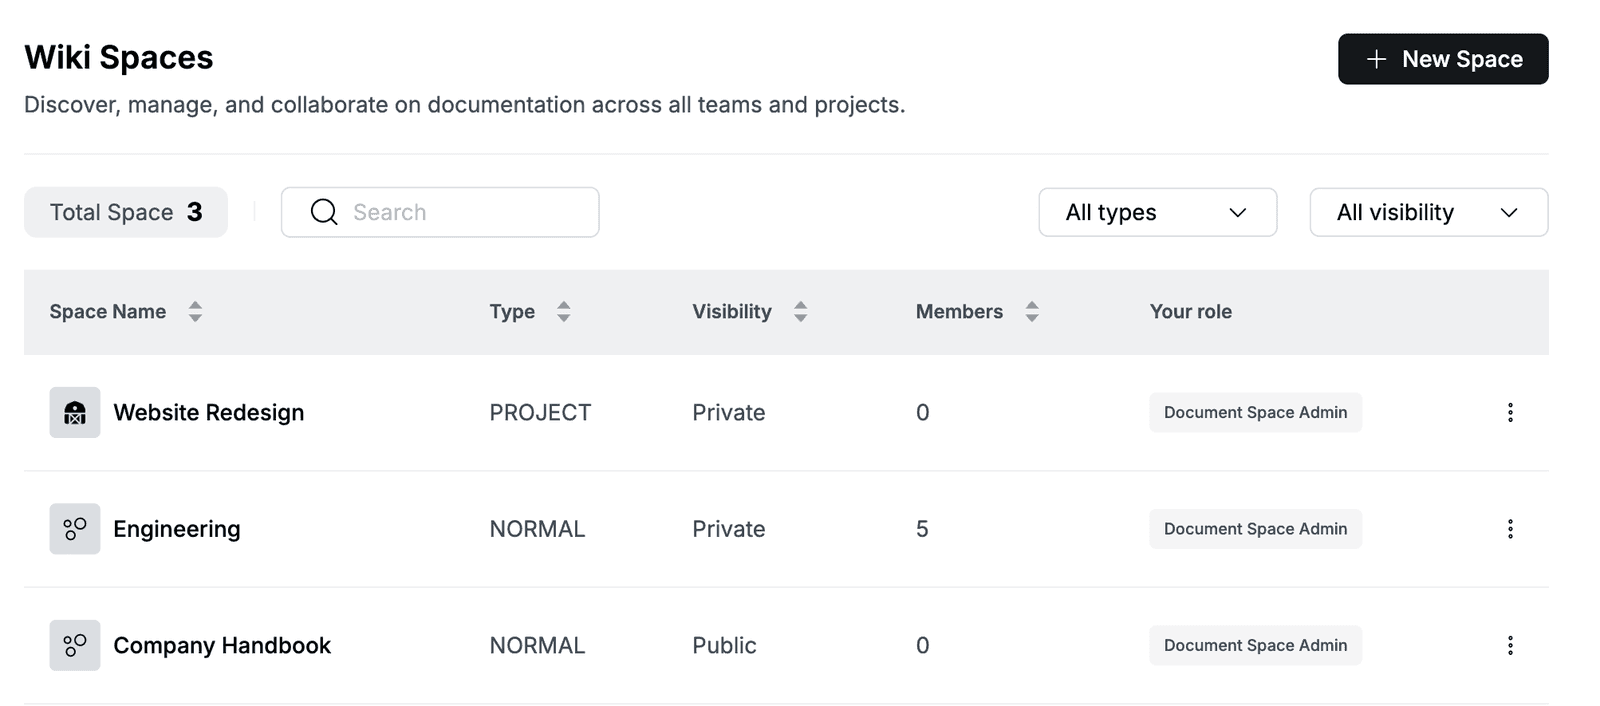
Go to Wiki. The Wiki Spaces list shows every space you can access, with its Type, Visibility, number of Members and Your role.
- To find a space, type in Search, or filter by All types and All visibility.
- To open a space, click its name.
- To switch to another space while you work, click the space name at the top of the left panel and select a space. Click All wiki spaces to return to the list.
Create a space
- Go to Wiki and click New Space.
- Select the space type:
- Normal space for a team or topic, such as
Company Handbook. - Project space for a Planix project. Select the Linked project. The space name, description, visibility and members come from the project and stay in sync with it.
- Normal space for a team or topic, such as
- For a normal space, enter a name, a Description, and select the Visibility:
- Public space: everyone in the workspace can find and view it.
- Private space: only space members can find and access it.
- Click Create.
The new space opens with a General collection and a Welcome doc that you can rename and edit.
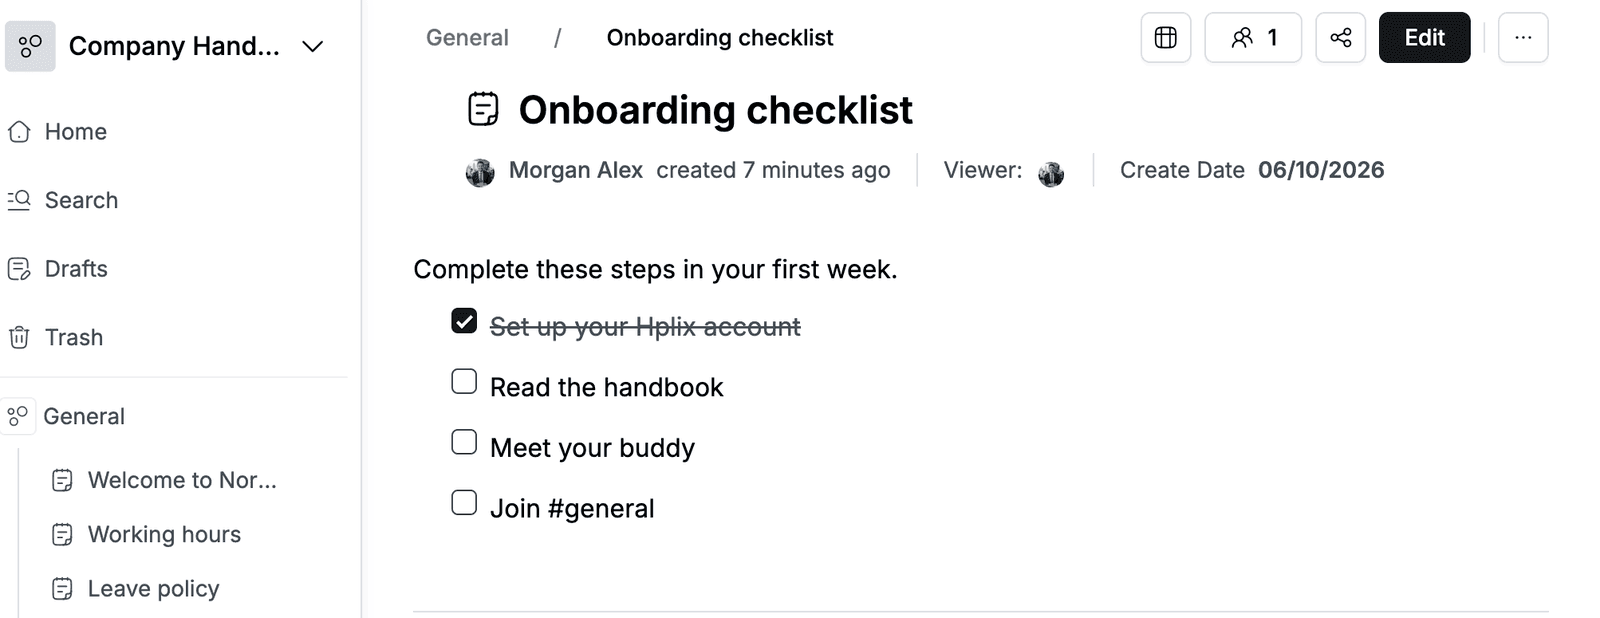
Add a doc
- Open the space and click a collection in the left panel, for example General.
- Click Add Doc. An Untitled document appears in the collection.
- Click the new doc, then click Edit.
- Enter a title, for example
Onboarding checklist. - Write the content. Type / to insert headings, lists, checklists, tables, images and other blocks.
- Click Save.
To change a doc later, open it and click Edit. Readers can leave feedback in the comment box under the doc.
To group docs, add a folder: open the collection and click Add Folder. To add a new top-level section to the space, click New collection in the left panel, enter a Collection name and Description, set its Permissions, and click Create.
Manage a doc
Open the doc and click ... at the top right. The menu includes:
- Star, Copy link and Print.
- New nested document to add a child doc under this one.
- Duplicate, Move and Archive.
- Permissions and History.
- Unpublish and Delete.
Unpublished docs are listed under Drafts in the left panel. Deleted docs go to Trash, where you can restore them or delete them permanently.
Share a doc
- Open the doc and click the share button next to Edit.
- Under Add members, search for a person and choose their access, such as Can view.
- Under All members, set what everyone else in the workspace can do with the doc, or keep No Access.
Add members to a private space
Project spaces
Members of a project space are synced from the Planix project. Manage them in the project instead.
-
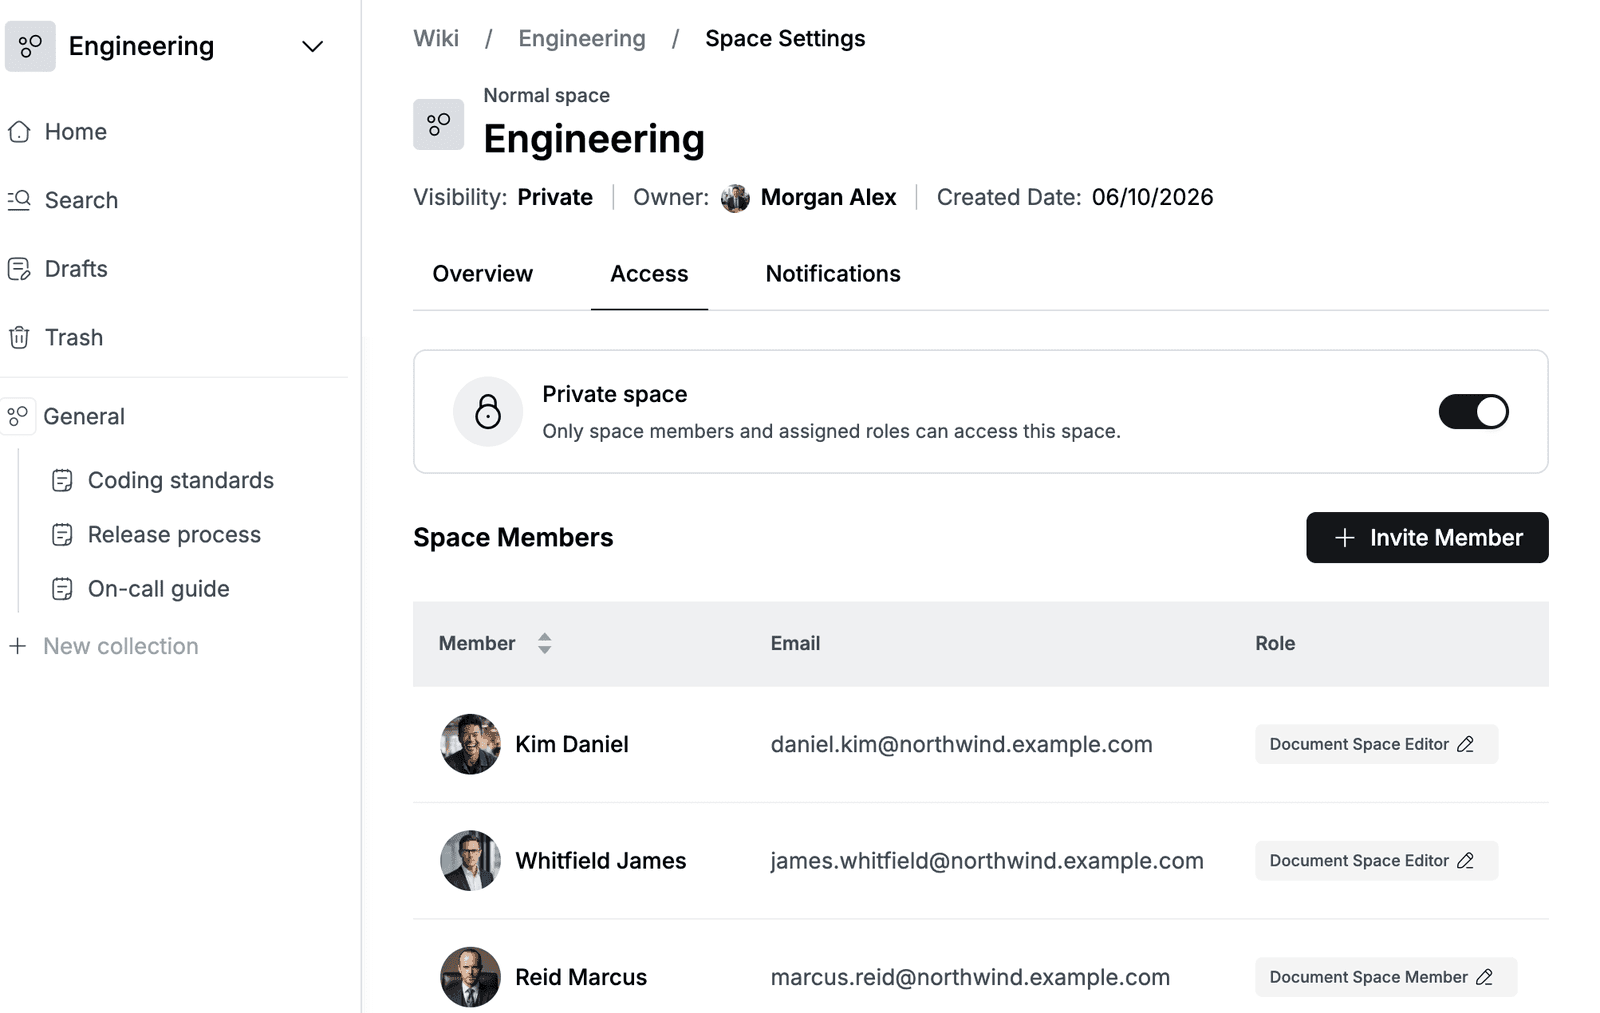
Go to Wiki, click ⋮ next to the space, and click Space Settings.
-
Click the Access tab.
-
Click Invite Member.
-
Search for people by name or email and select them.
-
Select a Space Role for everyone you are inviting:
Role Can Document Space Admin Manage the space and its documents. Document Space Editor Create, edit and delete content in the space. Document Space Member View content in the space. -
Optional: add a Message.
-
Click Send Invite.
To give people different roles, invite them in separate batches. To change a member's role later, click the edit icon next to their role.
Change space settings
- Go to Wiki, click ⋮ next to the space, and click Space Settings.
- Use the tabs:
- Overview: change the name, icon, description and visibility.
- Access: make the space private or public and manage members.
- Notifications: choose which activity sends in-app notifications to members: New document published, Significant updates, Comments and discussions and Space access changes.