
Document
Write documents with headings, lists and tables, comment on them with your team and download them as Word files.
Document lists the documents in your storage and opens them in the document editor. Use it for plans, briefs, letters and any other text you write and review with your team.
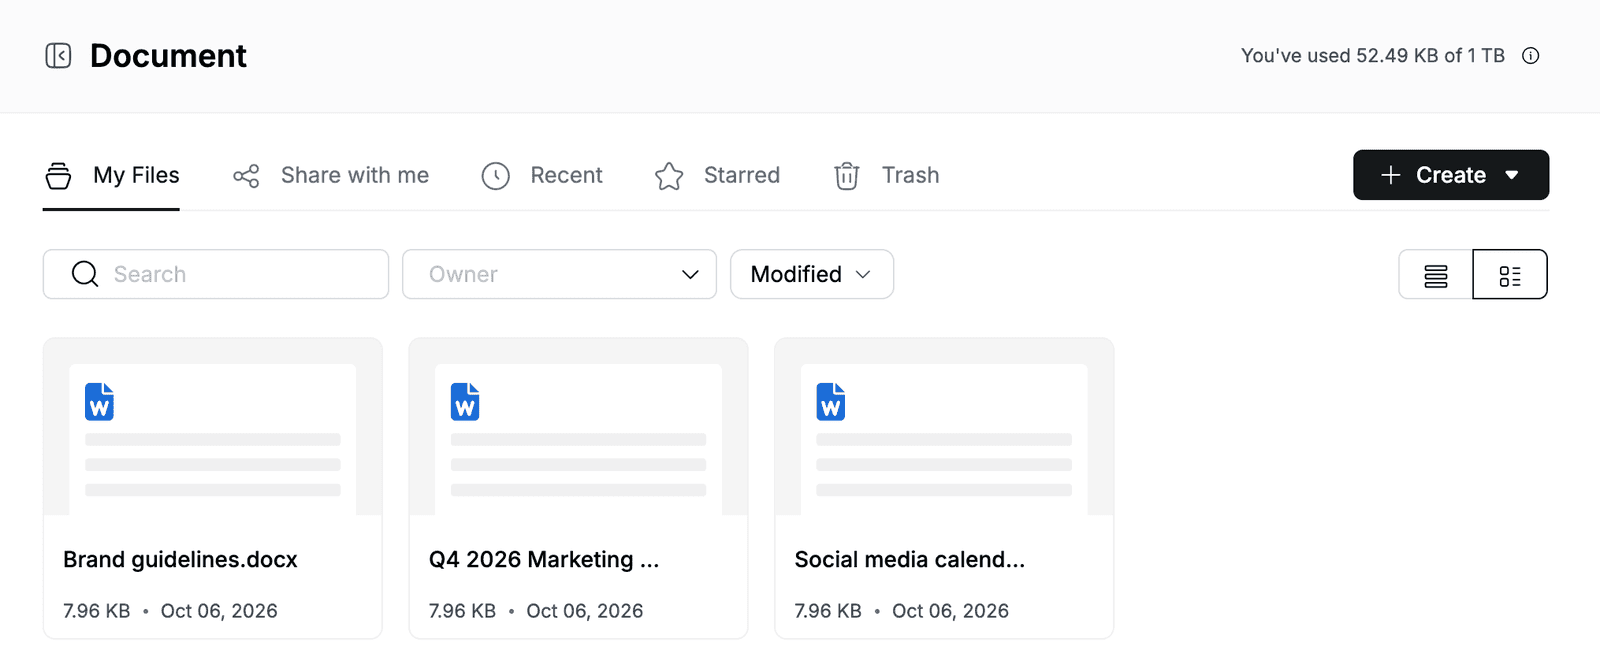
Find your way around
- My Files lists every document you own, including documents inside folders. Share with me, Recent, Starred and Trash work the same way as in My Storage.
- Use Search, the Owner filter and the Modified sort to find a document. Switch between list and grid view with the icons on the right.
- The storage you have used is shown at the top right.
Create a document
- Go to Document.
- Click Create > Create Doc.
- In Create File, select Blank, or pick a template, for example Meeting Notes under Projects & Product.
The document opens in a new browser tab with the name new-document.
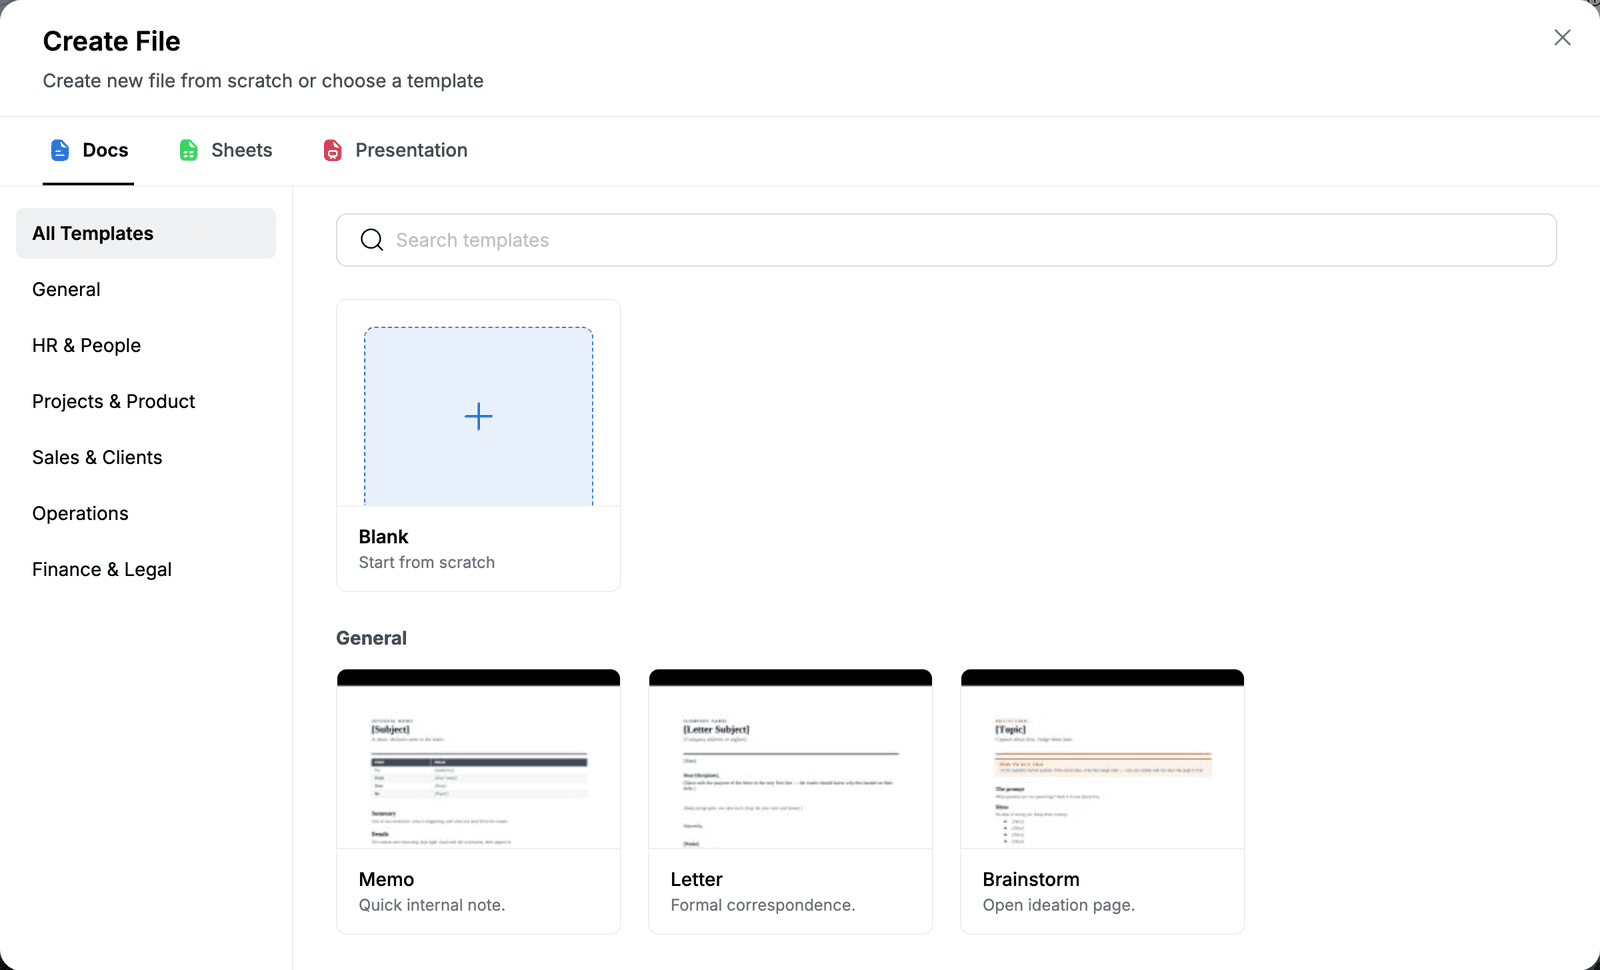
The templates are grouped into General, HR & People, Projects & Product, Sales & Clients, Operations and Finance & Legal. Use Search templates to find one by name.
To give the document a name, go back to the list, right-click it and click Rename. Enter a name, for example Q4 2026 Marketing Plan, and click Save.
To add an existing file instead, click Create > File upload.
Write and format text
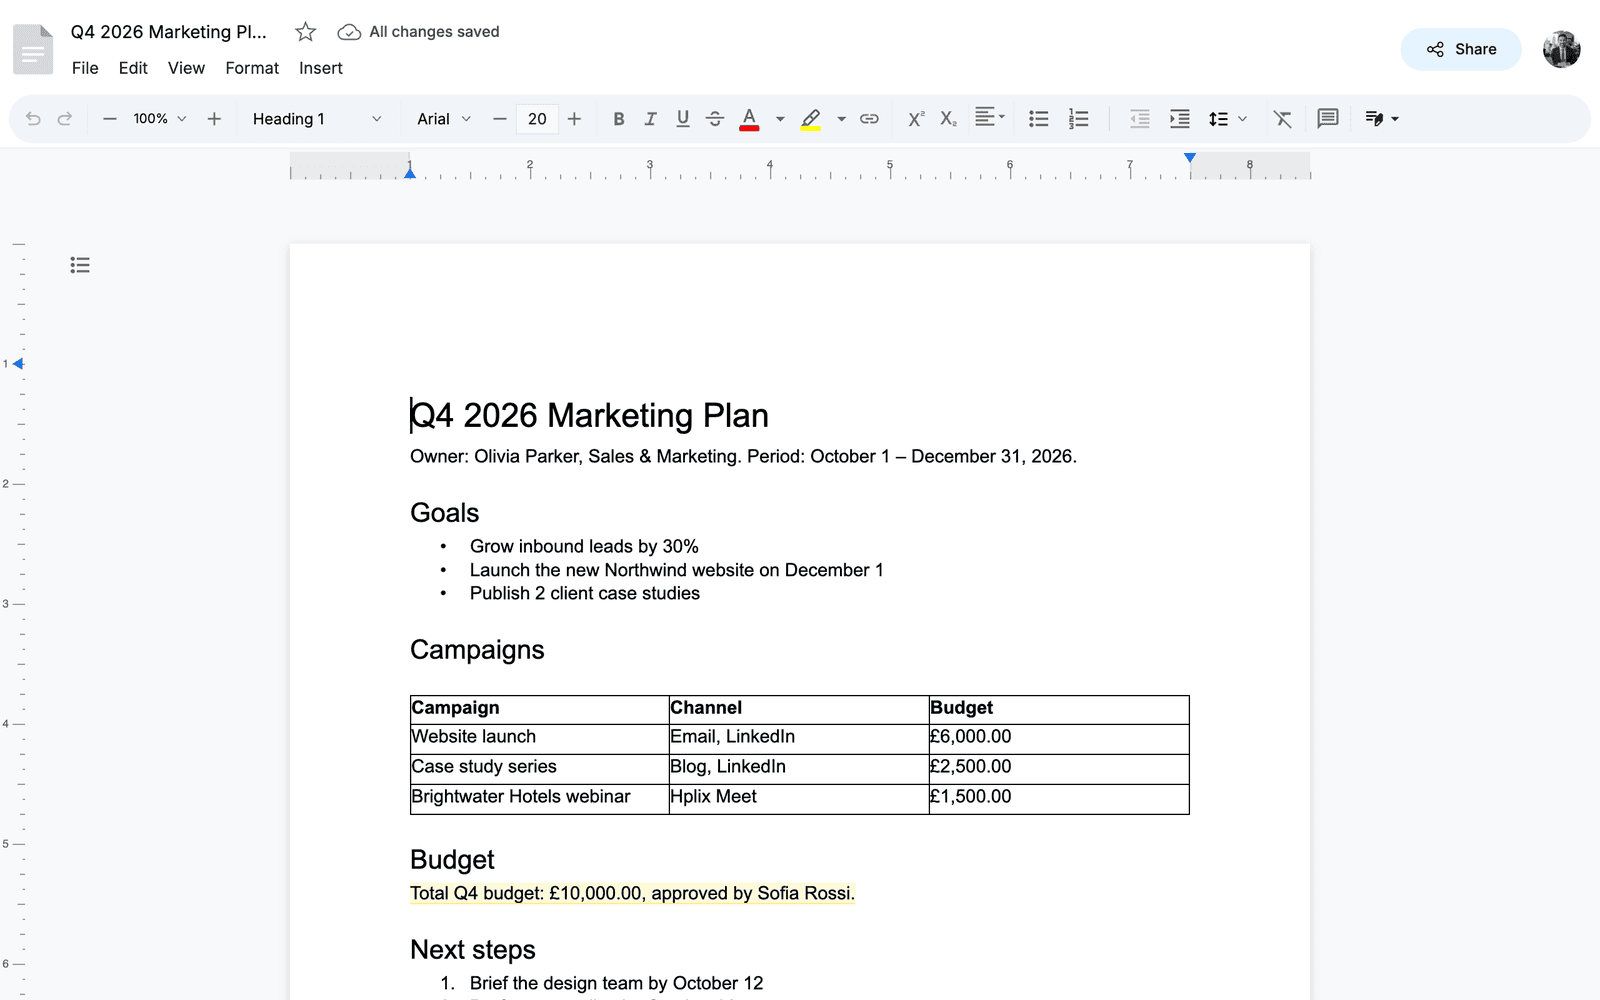
Type on the page. Changes save automatically, and All changes saved appears next to the document name.
- Headings: open the paragraph style list on the toolbar (it shows Normal text) and choose Heading 1 to Heading 4, Title or Subtitle.
- Lists: click the bulleted or numbered list icon on the toolbar.
- Text style: use the toolbar for font, size, Bold, Italic, Underline, Strikethrough, text color, highlight and links. To remove formatting from selected text, click Format > Clear formatting.
- Tables: click Insert > Table and select the number of columns and rows. Press Tab to move to the next cell.
- More content: the Insert menu also adds an Image, Link, Symbol, Page break, Table of contents and Watermark.
To find text, click Edit > Find and Replace. To jump between headings, click the outline icon at the top left of the page.
Comment on a document
- Select the text you want to comment on.
- Click Insert > Comment, or click the comment icon that appears to the right of the page.
- Type your comment, for example
Can we keep £500.00 in reserve for paid social?, and click Comment.
The text is highlighted and the comment appears to the right of the page. To answer, type in Reply or add others with @. When the discussion is finished, click Resolve.
To show or hide all comments, click View > Toggle comments sidebar.
Share a document
- In the editor, click Share > Share.
- Under Invite team members, choose what people can do: Full access, Can edit or Can view.
- Search for a person by name or email and select them.
- Click Add, then click Done.
Under Share with space members, choose who else can open the document:
| Option | Who can open the document |
|---|---|
| Only people invited | Only the people you added |
| Everyone at your workspace | Every member of the workspace |
| Everyone has this link | Anyone with the link |
To copy the link, click Share > Copy link in the editor.
Save a version
To keep the current state of a document, click File > Save a version. Version saved appears at the top right.
Download or print a document
- To download the document as a Word file (.docx), click File > Download in the editor. In the file list, you can also right-click a document and click Download.
- To print it, click File > Print.
- To change the paper Size, Orientation or Margins, click File > Page setup, then click Apply.
Manage documents in the list
Right-click a document, or click ⋮ at the end of its row, to:
- Open, Rename or Make a copy of it.
- Share it or Move it to a folder, for example
Marketing. - Add to starred so it appears under Starred.
- See File details, such as who has access, size and owner.
- Remove it.